
The first time I noticed Finn shaking his head, I didn’t think much of it.
He’s a Golden Retriever. He shakes his head after swimming. After eating. After rolling on the carpet. After existing, basically.
But then the shaking became more frequent. Then came the smell. That distinct, yeasty, corn-chip-but-worse smell that every dog owner learns to recognize. I lifted his ear flap and saw it—a dark, reddish-brown buildup that looked like coffee grounds mixed with earwax.
My heart sank. Ear infection.
I did what any panicked dog mom does at 9 PM on a Sunday: I Googled “home remedies for dog ear infection.” And there it was, on page after page, forum after forum. “Use apple cider vinegar! It’s natural! It works!”
I almost did it. I had a bottle of organic ACV in my pantry. I was ready to mix it up and pour it into Finn’s ear.
But something stopped me. A tiny voice that said “maybe ask a vet first.”
So I waited. I called my vet Monday morning. And what she told me surprised me—and honestly, worried me. Because a lot of the advice online about using apple cider vinegar for dog ears is, at best, incomplete. And at worst, dangerous.
This article is what I wish I had read that Sunday night. I’m going to tell you everything I learned about using apple cider vinegar for dog ear cleaning—the right way, the wrong way, and the times you should never use it at all.
Because Finn’s ears are healthy now. But if I had poured vinegar into an infected ear? That story could have had a very different ending.
The Short Answer: Can You Use ACV for Dog Ears?
Yes, but only in very specific situations—and never if your dog has an active ear infection.
Let me repeat that because it’s important: Apple cider vinegar is for routine maintenance of HEALTHY ears only. It is not a treatment for ear infections.
If your dog’s ears are red, swollen, painful, smelly, or have discharge, vinegar will make it worse. I’ll explain why in a minute.
But if your dog has clean, healthy ears and you just want a natural, affordable way to keep them that way? Diluted apple cider vinegar can be an option. You just need to know exactly how to do it safely.
What the Vets Say About ACV for Dog Ears
I want to be upfront with you. I reached out to veterinary sources for this article, and the consensus is clear.
Veterinarians generally do NOT recommend putting apple cider vinegar in a dog’s ears.
Here’s why, according to Dr. Veronica Higgs, DVM (quoted in a Chewy veterinary article): Using ACV for a dog’s ear infection can cause drying and inflammation and potentially damage the eardrum (tympanic membrane). It can also make an infection worse.
Another veterinarian, Dr. Teresa Manucy, adds that because ACV is so acidic, it can cause serious skin irritation when applied topically. And if your dog licks it off (which they will, because it’s on their ear), that can lead to gastrointestinal issues too.
So why do so many online sources recommend it?
Because apple cider vinegar DOES have antibacterial and antifungal properties. It CAN help balance pH. In theory, it makes sense.
But the problem is the ear canal. It’s delicate. The skin inside a dog’s ear is thin and sensitive. When that skin is already inflamed from an infection, pouring acid (even diluted acid) on it is like pouring lemon juice on a paper cut. It burns. It inflames. And it can push the infection deeper.
The bottom line from vets: If your dog has signs of an ear infection (redness, swelling, discharge, odor, pain), skip the home remedies and go to the vet. If your dog’s ears are healthy and you want to maintain them, diluted ACV can be used carefully—but there are gentler options.
When to Use ACV (and When to Absolutely NOT)
Let me give you a clear decision guide.
✅ Safe to Use Diluted ACV For:
| Routine cleaning of HEALTHY ears | Mild acid helps break down wax |
| After swimming (preventive) | Dries excess moisture |
| Dogs with floppy ears (maintenance) | Reduces yeast-friendly environment |
| No signs of infection (no redness, odor, pain) | Ear canal is intact and healthy |
❌ NEVER Use ACV If:
| Red or swollen ears | Acid will burn inflamed tissue |
| Foul odor or discharge | Sign of infection—needs medication, not vinegar |
| Dog is shaking head or scratching ears | Pain indicates underlying problem |
| Visible sores or wounds | Vinegar will sting and delay healing |
| Ruptured eardrum (you won’t know for sure without a vet) | Can cause inner ear damage and hearing loss |
| Chronic ear problems | Needs veterinary diagnosis, not home treatment |
Real talk: If you’re not 100% sure your dog’s ears are healthy, don’t use ACV. Take them to the vet first. A $50 exam is cheaper than treating a worsened infection.
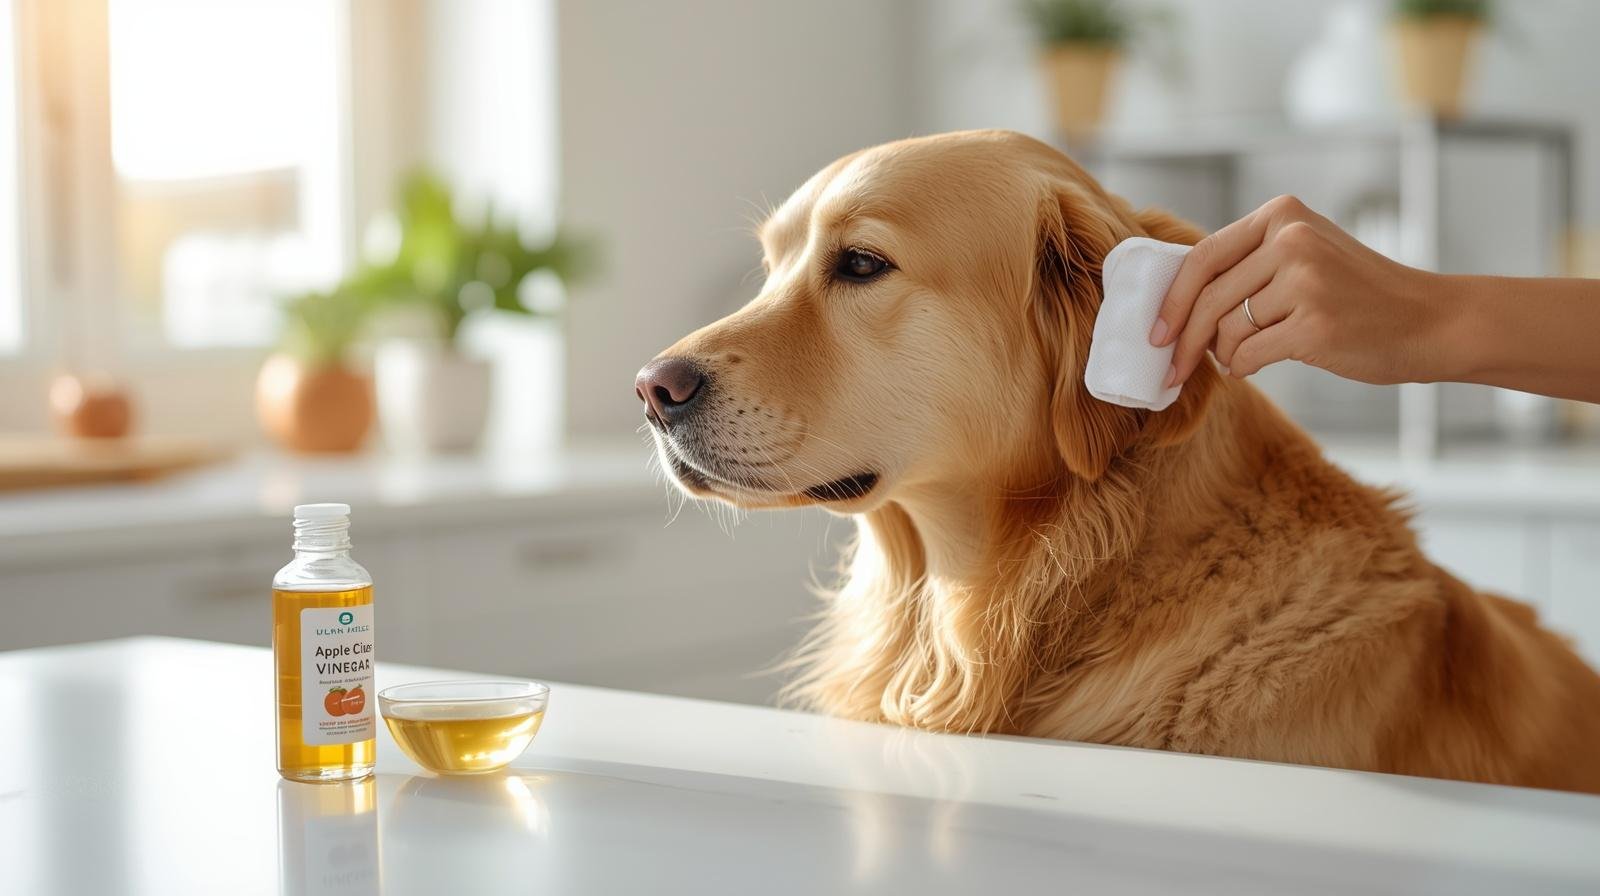
How to Make a Safe DIY Dog Ear Cleaner with ACV
Okay, you’ve checked your dog’s ears. They’re pink, clean, and healthy. No smell. No redness. No pain. You just want a natural cleaner for maintenance.
Here’s the safe recipe.
The Basic Recipe (1:1 Dilution)
Ingredients:
- 1 part raw, unfiltered apple cider vinegar (with “the mother”)
- 1 part distilled water (not tap water—tap water can introduce bacteria)
Why distilled water? Tap water contains minerals and potential bacteria. In a warm, dark ear canal, that moisture can actually promote fungal and bacterial growth. Distilled water is sterile.
Instructions:
- Mix equal parts ACV and distilled water in a clean glass bottle or jar
- Shake well before each use
- Warm the solution to body temperature by holding the bottle in your hands (cold liquid is uncomfortable for dogs)
Optional Additions (For Sensitive Ears)
If your dog has particularly sensitive ears, you can make the solution gentler:
| Aloe vera juice | Replace 1/2 of the water | Soothing, anti-inflammatory |
| Witch hazel (alcohol-free) | 1 part, reduce ACV to 1/2 part | Natural astringent, less acidic |
| Green tea (cooled) | Replace water entirely | Antioxidant, anti-inflammatory |
The “Extra Gentle” Recipe for Maintenance
For dogs with a history of ear sensitivity, try this instead of ACV:
- 1 part witch hazel (alcohol-free)
- 1 part aloe vera juice
- 1 part distilled water
- Optional: 2 drops of coconut oil (melted)
This cleans without any acidity.
Step-by-Step: How to Clean Your Dog’s Ears Safely
Once you have your solution ready, here’s the correct technique.
What You’ll Need
- Your diluted ear cleaner
- Cotton balls or gauze pads (lots of them)
- Clean towels
- High-value treats (cheese, chicken, peanut butter)
- A helper (optional, but helpful for nervous dogs)
What you should NOT use: Cotton swabs (Q-tips), pointed applicators, or anything you insert into the ear canal. These push debris deeper and can rupture the eardrum.
The 7-Step Ear Cleaning Process
Step 1: Check the ears first.
Look inside. If you see redness, swelling, discharge, or if your dog flinches when you touch the ear, STOP. Do not clean. Call your vet.
Step 2: Create a calm environment.
Find a quiet spot. Have treats ready. If your dog is nervous, have a helper gently hold them or wrap a small dog in a towel (like a burrito) with only the head free.
Step 3: Apply the solution to a cotton ball (not directly into the ear).
This is the method most dogs prefer. Soak a cotton ball with your diluted solution. Place it in your dog’s ear and gently press to release the liquid. This is less startling than squirting liquid directly into the ear.
Alternative method: If your dog tolerates it, you can use a dropper or squeeze bottle to put a few drops directly into the ear canal. Never insert the tip into the ear—just aim at the opening.
Step 4: Massage the base of the ear.
Gently massage the area at the base of the ear (where it meets the head) for 20-30 seconds. You should hear a squishing sound—that’s the solution working its way into the ear canal.
Step 5: Let your dog shake.
Step back and let your dog shake their head. This is a good thing! The shaking helps bring loosened wax and debris up and out of the ear canal. Have a towel ready to catch the spray.
Step 6: Wipe the outer ear.
Use a fresh cotton ball or gauze pad to gently wipe the visible part of the ear (the ear flap and the opening of the canal). Never insert anything into the ear canal itself. Use a new cotton ball for each wipe until the cotton comes away clean.
Step 7: Reward your dog.
Treats, praise, ear scratches (if they like them). You want your dog to associate ear cleaning with positive things.
How Often Should You Clean?
| Routine maintenance, healthy ears | Every 1-2 weeks |
| After swimming or bathing | As needed (dry thoroughly) |
| Floppy-eared breeds (Cocker Spaniels, Bassets) | Weekly |
| Dogs with history of ear issues | Follow vet’s recommendation |
Don’t over-clean. Cleaning too often can strip natural oils and disrupt the healthy ear microbiome, actually making infections more likely.
What About Coconut Oil and Other Natural Cleaners?
You’ll see a lot of recipes online combining ACV with coconut oil, witch hazel, or other ingredients. Let me break down what works and what doesn’t.
Coconut Oil
Does it work? Yes, for certain situations. Coconut oil has antimicrobial properties and can soothe dry, irritated ear flaps.
How to use it: Warm a small amount of coconut oil until liquid. Apply to a cotton ball and wipe the visible part of the ear. Do NOT pour liquid coconut oil into the ear canal—it can trap moisture and make yeast infections worse.
Best for: Dry, flaky ears. NOT for moist or infected ears.
Witch Hazel
Does it work? Yes, as a gentle astringent. It cleans without excessive drying.
How to use it: Mix equal parts alcohol-free witch hazel and distilled water. Use the same way as the ACV solution.
Best for: Dogs with sensitive ears who can’t tolerate vinegar.
Green Tea
Does it work? Yes. Green tea has natural anti-inflammatory and antioxidant properties. Several holistic veterinarians recommend it.
How to use it: Brew a cup of green tea, cool to room temperature, and use as an ear rinse. No dilution needed.
Best for: Routine maintenance for dogs with mild ear sensitivity.
Hydrogen Peroxide
Does it work? NO. Do not use hydrogen peroxide in your dog’s ears.
Why not: Hydrogen peroxide can cause stinging, burning, and irritation. It damages healthy tissue along with debris. It should never be used routinely in ears.
Signs of Ear Problems: When to See the Vet
This is the most important section of this article. Knowing the difference between “needs cleaning” and “needs a vet” could save your dog pain and hearing.
Signs Your Dog’s Ears Are Healthy
- Pink (not red) skin inside the ear flap
- Minimal, light-colored wax
- No odor
- Dog doesn’t react when you touch the ears
Signs Your Dog Needs a Vet (Not a Home Remedy)
| Redness or swelling | Inflammation or infection |
| Thick, dark brown or black discharge | Yeast infection or ear mites |
| Yellow or green discharge | Bacterial infection |
| Strong, foul odor | Advanced infection |
| Head shaking or tilting | Discomfort, possibly middle ear involvement |
| Pain when touched | Infection has progressed |
| Scabs or bleeding | Chronic irritation or self-trauma |
If you see any of these signs, do not use ACV or any home remedy. Call your vet. They will likely want to do an otoscope exam and possibly take a swab for cytology (looking at the debris under a microscope) to identify exactly what kind of infection it is.
Why You Can’t Treat Infections at Home
Here’s the hard truth: Ear infections are caused by specific organisms—bacteria, yeast, or sometimes both. The treatment for a bacterial infection is antibiotics. The treatment for a yeast infection is antifungals. Using the wrong treatment (like ACV on a bacterial infection) won’t help and may make things worse.
Also, many ear infections involve the middle ear (behind the eardrum), not just the outer ear. You cannot treat a middle ear infection with drops. Your dog needs oral medication.
I learned this lesson the hard way. Finn’s ear infection turned out to be a bacterial infection with a perforated eardrum. If I had poured vinegar into that ear, it would have gone straight into his middle ear. The vet’s words still haunt me: “Good thing you didn’t try anything at home.”
Preventing Ear Problems: The Real Secret
The best treatment is prevention. Here’s what actually works to keep your dog’s ears healthy.
1. Dry Ears Thoroughly After Water
Moisture in the ear canal is the #1 cause of ear infections. Bacteria and yeast love warm, dark, wet places.
After swimming or bathing: Use a soft towel to dry the outer ear. You can also use a hair dryer on the lowest, coolest setting at a distance—but only if your dog tolerates it.
2. Regular Checks, Not Over-Cleaning
Check your dog’s ears weekly. Look for redness, odor, or discharge. Smell them. Healthy ears have a mild, non-offensive smell.
But don’t clean them every week unless your vet recommends it. Over-cleaning disrupts the natural ear microbiome.
3. Address Underlying Allergies
Many dogs with chronic ear problems have underlying allergies—to food (chicken, beef, dairy are common triggers) or environmental allergens (pollen, dust mites).
If your dog has recurrent ear infections, ask your vet about allergy testing or an elimination diet.
4. Keep Ear Hair Trimmed
Breeds like Poodles, Schnauzers, and Shih Tzus grow hair inside their ear canals. This hair traps moisture and debris. Ask your groomer or vet to pluck or trim the ear hair.
5. Use a Vet-Approved Maintenance Cleaner
If your dog needs regular ear cleaning (due to floppy ears or a history of issues), ask your vet to recommend a pH-balanced, dog-specific ear cleaner. Commercial options like Epi-Otic are designed to dry the ear canal without irritation.
FAQ
Can I use white vinegar instead of apple cider vinegar?
It’s not recommended. White vinegar is more acidic (typically 5-10% acetic acid vs. ACV’s 5-6%) and lacks the beneficial enzymes and probiotics found in raw, unfiltered ACV. It may be more irritating to sensitive ear tissue.
How do I know if my dog’s eardrum is ruptured?
You can’t tell without a vet’s otoscope exam. Signs that suggest a ruptured eardrum include: head tilt, loss of balance, eye twitching (nystagmus), sudden hearing loss, or if your dog cries out in pain when you touch the ear. If you suspect a rupture, do NOT put any liquid in the ear and see a vet immediately.
My dog’s ears smell like corn chips. Is that an infection?
That “Fritos” smell is often caused by Pseudomonas bacteria or yeast. It’s not necessarily an emergency, but it’s not normal either. If the smell is mild and your dog has no other symptoms (redness, scratching, discharge), try a gentle cleaning. If the smell persists or worsens, see a vet.
Can I put apple cider vinegar on my dog’s paws for itching?
Yes, this is safer than using it in ears. Mix equal parts ACV and water. Soak your dog’s paws for 2-3 minutes, then dry thoroughly. Do this no more than twice a week. Never apply to open sores or cracked paws—it will sting.
My dog hates having his ears touched. What do I do?
Start with desensitization. Touch the ear flap briefly while giving a treat. Gradually work up to lifting the ear, then touching the inner ear, then cleaning. This takes days or weeks—go slow. If your dog is in pain (yelping when ears are touched), that’s a vet visit, not a training issue.
What’s the best homemade ear cleaner for dogs with chronic yeast?
For yeast-prone dogs (with healthy, non-inflamed ears), the 1:1 ACV and distilled water solution can help maintain a slightly acidic pH that yeast dislikes. However, chronic yeast is usually a symptom of an underlying allergy. Treat the allergy (with diet change or medication), and the yeast often resolves.
Final Thoughts: Don’t Let the Internet Scare You (or Mislead You)
I’m glad I didn’t pour vinegar into Finn’s infected ear that Sunday night. But I’m also glad I didn’t give up on natural solutions entirely.
Now, I use a simple routine: weekly ear checks, thorough drying after swimming, and an occasional gentle wipe with witch hazel and water when needed. Finn’s ears have been healthy for two years straight.
The internet is full of advice about apple cider vinegar for dogs. Some of it is good. Some of it is dangerous. The difference comes down to one question: Is your dog’s ear healthy or infected?
If healthy? Diluted ACV can be a fine maintenance cleaner. Use the 1:1 recipe, never insert anything into the ear canal, and clean no more than every 1-2 weeks.
If infected? Put down the vinegar. Pick up the phone. Call your vet.
Your dog’s ears are delicate. Their comfort—and their hearing—depends on you making the right call. Now you know how.
Finn is curled up next to me, ears clean, breath (mostly) fresh, no smell. He doesn’t know I almost made a mistake that Sunday night. But I do. And I’m grateful I waited.
You can wait too. When in doubt, vet first, vinegar later.
Have you tried homemade ear cleaners for your dog? What worked? What didn’t? Share your experience in the comments—your story might help another owner avoid a painful mistake.